Nothing like a bit of fun maths to get us all being creative! This is very simple, but effective.
You will need: a piece of paper, a pen, glue or a camera (if you want to keep your picture) and lots of interesting finds collected from your garden or during your daily walk. When you are collecting the finds, make sure you try and collect them in even numbers (2, 4 etc).
Once you have your finds, take your piece of paper. Draw a line down the middle of the paper (or fold it in half). Now work with your child to create a symmetrical pattern. You can do this as many times as you'd like.
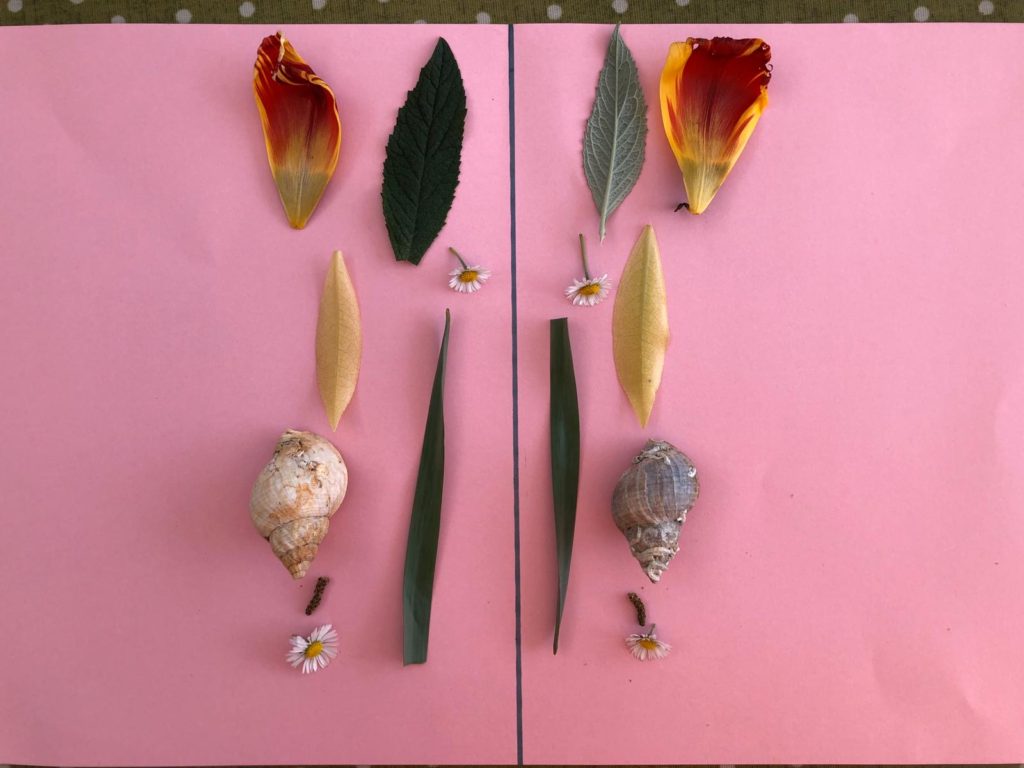
You may want to discuss other places you can find symmetrical patterns and go on a hunt round the garden for them. Many leaves, ants, woodlice, ladybirds, butterflies have symmetrical patterns on them.
Its been rather windy here for the past few days and it sounds like it has been similar around the UK. We thought making a wind sock to test the direction of the wind is fun and then using it in the garden or during your walk (or both!) playing with it afterwards is also great!
You will need: Tissue paper (or a newspaper sheet would do - thin paper is best as it is lighter). A strip of card (or a few strips of paper stuck together to make a thicker, stronger strip), glue, a hole punch (or something to make holes - a sharp pencil would do), some string.
- Take a big piece of tissue paper and a strip of card.
- Glue the card onto one end
- Bend the card into a circle and stick the ends together
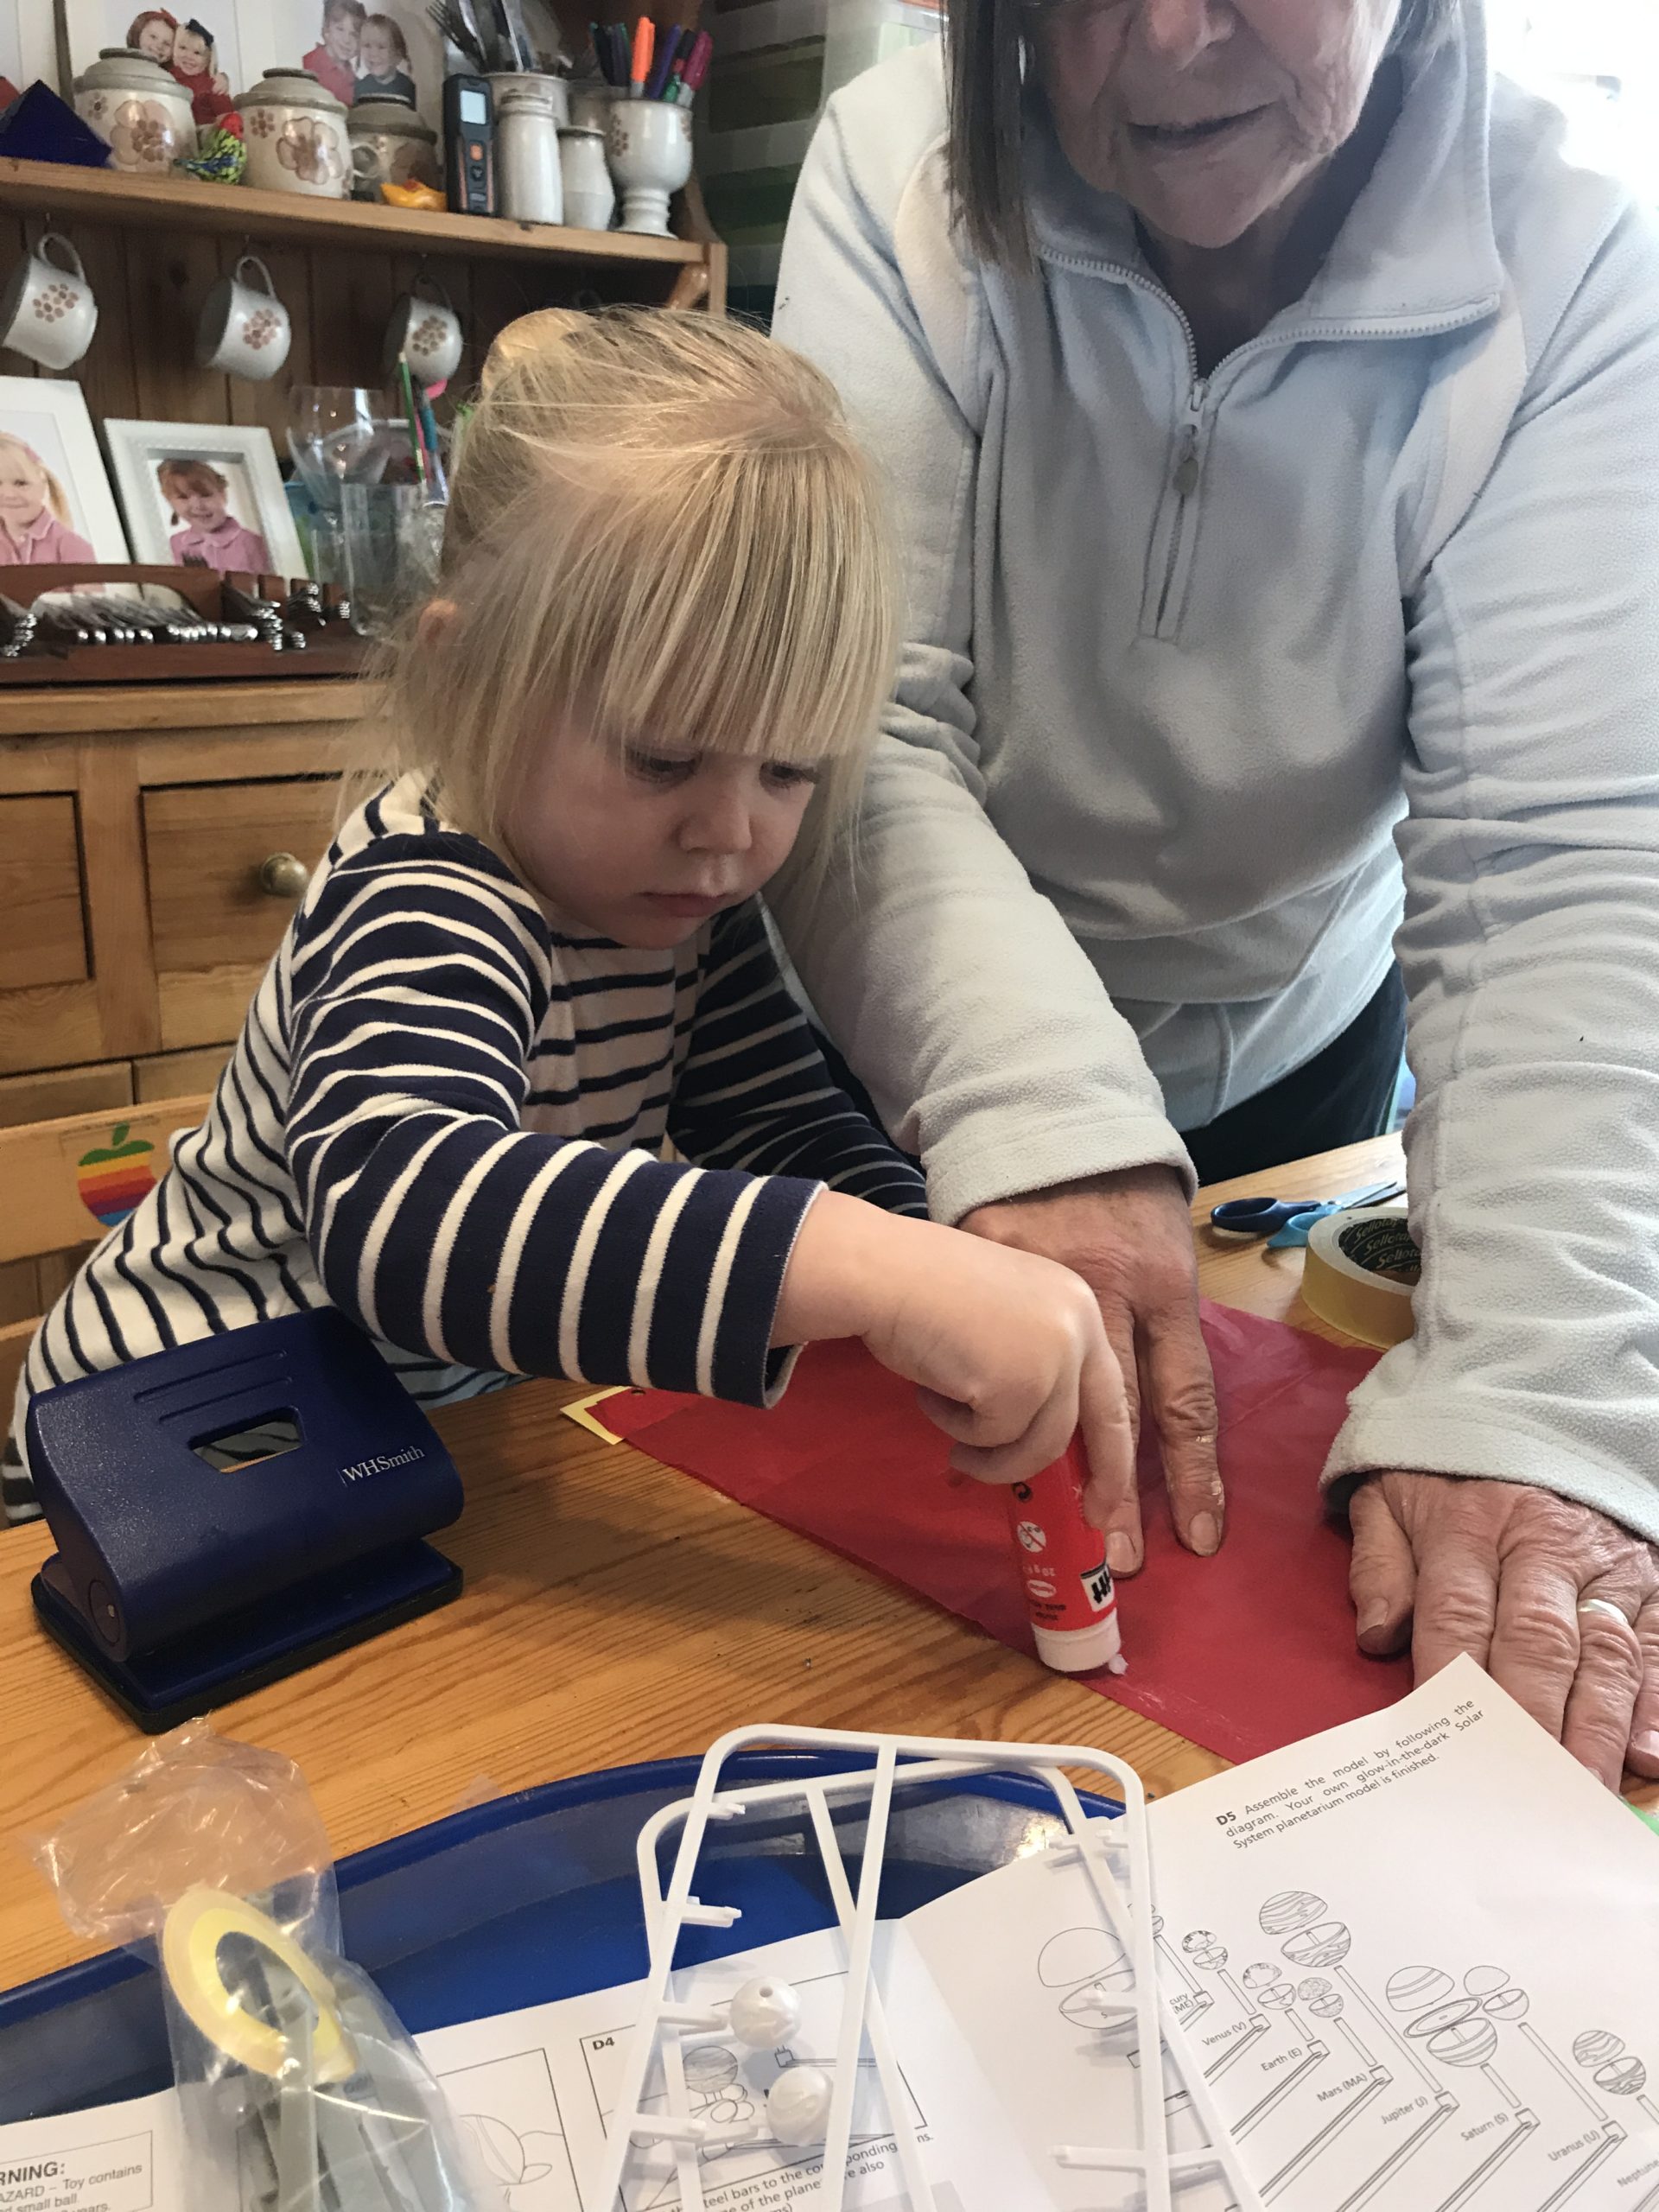
- tape the tissue paper along the seam to make a tube
- Glue tissue paper tails around the opening in a zig-zag pattern
- tie or tape 4 strings to the card
Hold up your windsock and see if you can work out which way the wind is blowing. You can try running up and down the garden (or a local space) to see if it flies behind you better in one direction or another - why do you think this is?
We spent a lot of time running with it, making it fly like a kite and then trying to work out of the wind blows in the same direction everywhere in the garden (it didn't) and looking at why it might change. Enjoy!
You will need: a tin can, opened at both ends and with the edges smoothed down, some bamboo canes, some sticks, a bit of garden twine or string, a small saw (or decent pair of secateurs).
Thread the string through the can and tie a knot, so you have a hoop you can use for hanging horizontally. Now, measure and chop the bamboo cane so it is roughly the length of the can (this does not have to be very accurate, it doesn't matter if they are slightly different lengths). You can chop the bamboo with secateurs, but my children love cutting through the bamboo with a small saw. It's exciting and quite simple, so a good introduction to tools. If you do use a saw, we recommend, for safety, the child wears a gardening/leather glove on the hand not holding the saw. A bow saw works well so you can hold the other side and help the child to control it. Please read this essential safety guide to help you further (page 7 is about saws).
Once you have cut your bamboo, turn the can onto its end. Now you stuff the bamboo into the can until it is 1/2 full. This is a good opportunity to discuss "half and whole" with your child. Now you need to collect sticks. Hay works well too, really whatever you have to hand in the garden. We used bark from an old tree, sticks and dried leaves. Again, stuff them into the can so it is full enough that they will not fall out. Once this is completed, you just need to find a spot to put the bee home. Warm and sunny is best but even if you are in a city flat, the bees will appear eventually if it's hanging from a window or balcony (do make sure it is secure though, we don't want it falling on anyones head!)
Enjoy mason bee spotting!
A bit about Mason Bees, from the nurture store, simply because they are the most likely bees to come and live in your bee home. Mason bees are solitary bees who live in holes rather than hives. They don’t live in colonies with a queen, but instead live alone. They are peaceful bees. The male mason bee has no stinger, and the female mason bee only stings if trapped or squeezed, so they are a great friendly bee to encourage into your garden. Mason bees are smaller than honey bees and in the UK red mason bees are common.
This is pretty simple as long as you have some freezer space, but it is lovely!
You will need: 2 (or more, we used 4) egg shells (try to just have the top broken off), water, some flowers.
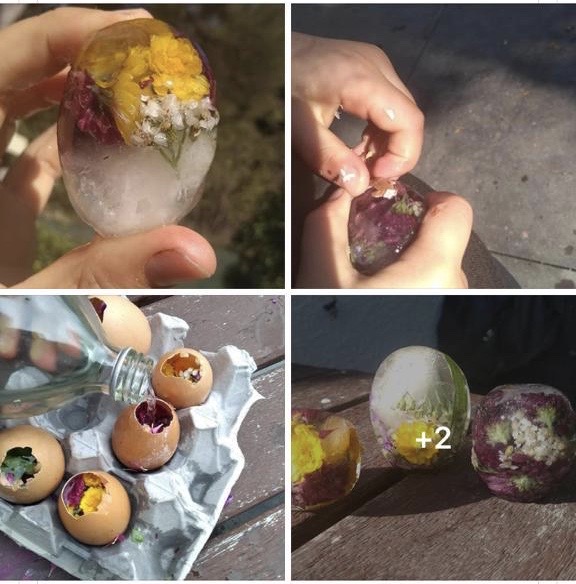
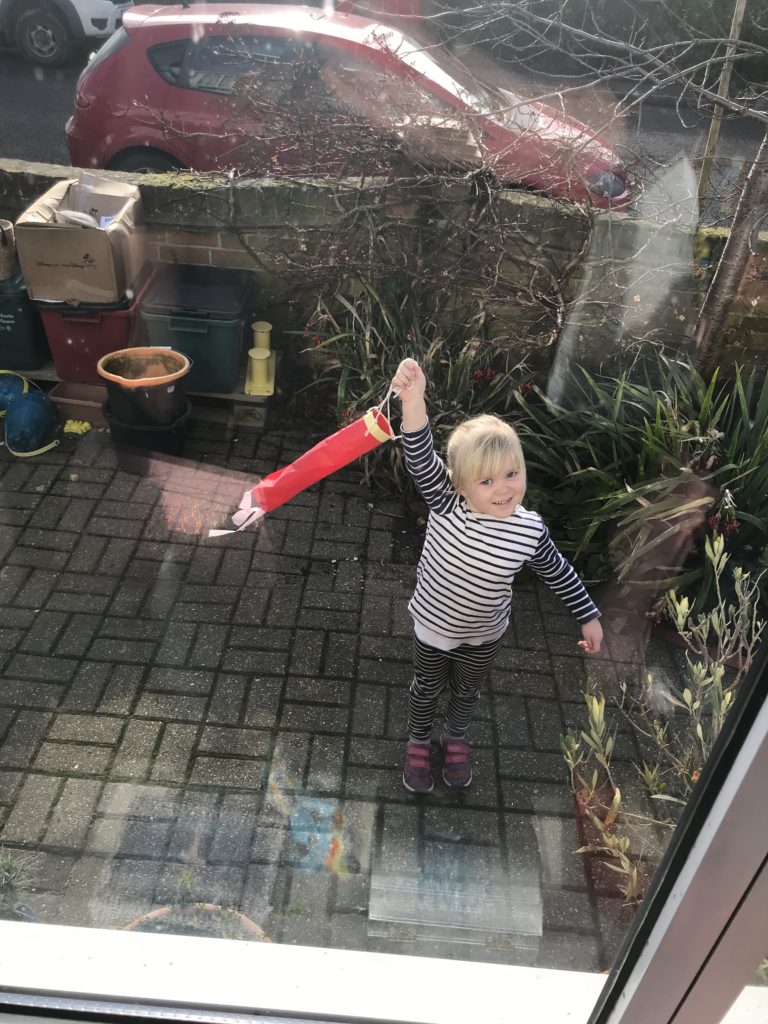
During your daily walk, or in your garden, collect a good handful of flowers - a mix of small and larger flowers works well (really big flowers do not work though, they don't fit into the egg shell!). Place the egg shells into an egg tray carefully, with the hole facing upwards. Fill with the flowers you collected, then carefully pour water into the eggs to fill them (great motor skills for smaller children). Pop them in their tray in the freezer, to turn to ice. Once they are ready (about 4 hours or over night) you can peel off the egg shell and you have some really pretty ice.
If you have older children, once you have trialled this, you can purchase glass resin (small amounts) and make paperweights with it in the same way. If you do this, remember a gently tap the egg tray to move air bubbles out of the resin.
This morning we are having a bit of a maths focus outside. You will need: a piece of paper, a pen and something to lean on, for you activity in the garden or your daily walk. After this, you will need graph paper (ideally, but plain paper will do), colouring pens or pencils, a writing pencil and a ruler.
To start with you are going to do a survey. To do this, you write down your find, and then put a line next to it for each one. When you have completed a block of 4, the 5th line will go across the group (showing the group of 5).
You will need to explain how a tally chat will work and help at the beginning but older children should be able to manage this themselves. The children will probably see loads and want to include them all - thats ok, you might want to end the activity there but if you chose to carry on select 5 or 6 items to include in a bar graph later.
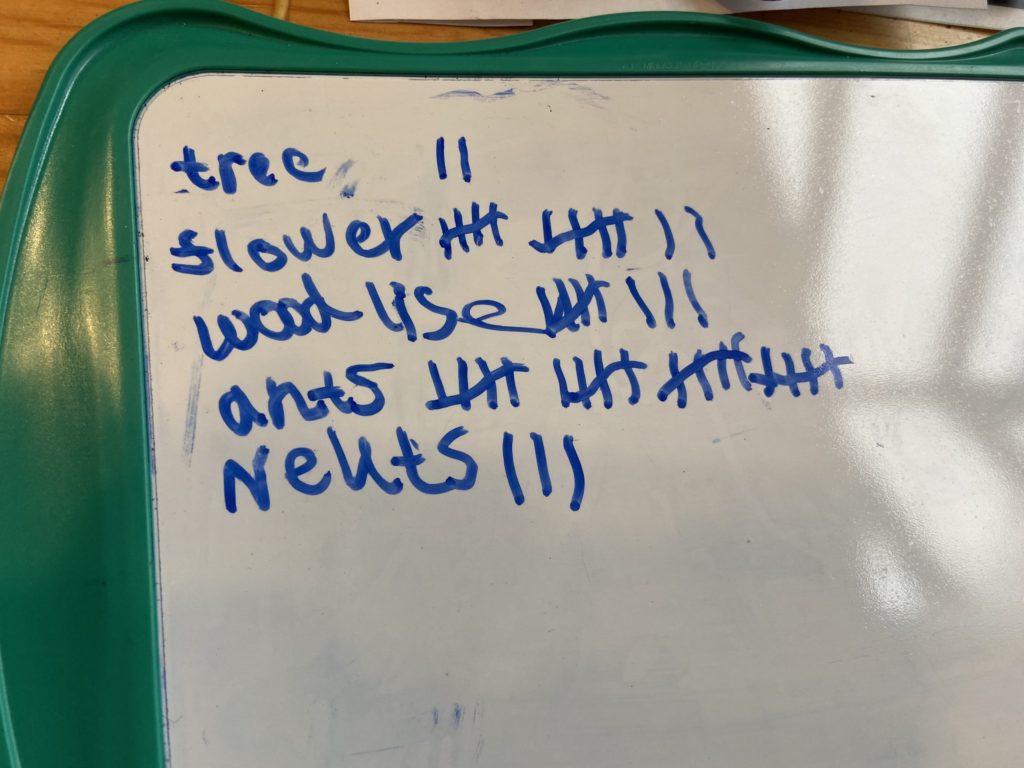
To complete a bar graph. Using the paper draw an axis. The horizontal axis (x) will be the items you spotted and the vertical axis (y) will be the number of the items you spotted. If you have graph paper, it's easy to write the numbers along the vertical axis, if you are using plain paper you will need to measure using the ruler and write a number up each centimetre (start at 0 on the bottom). For younger children parents might want to draw the axis first.
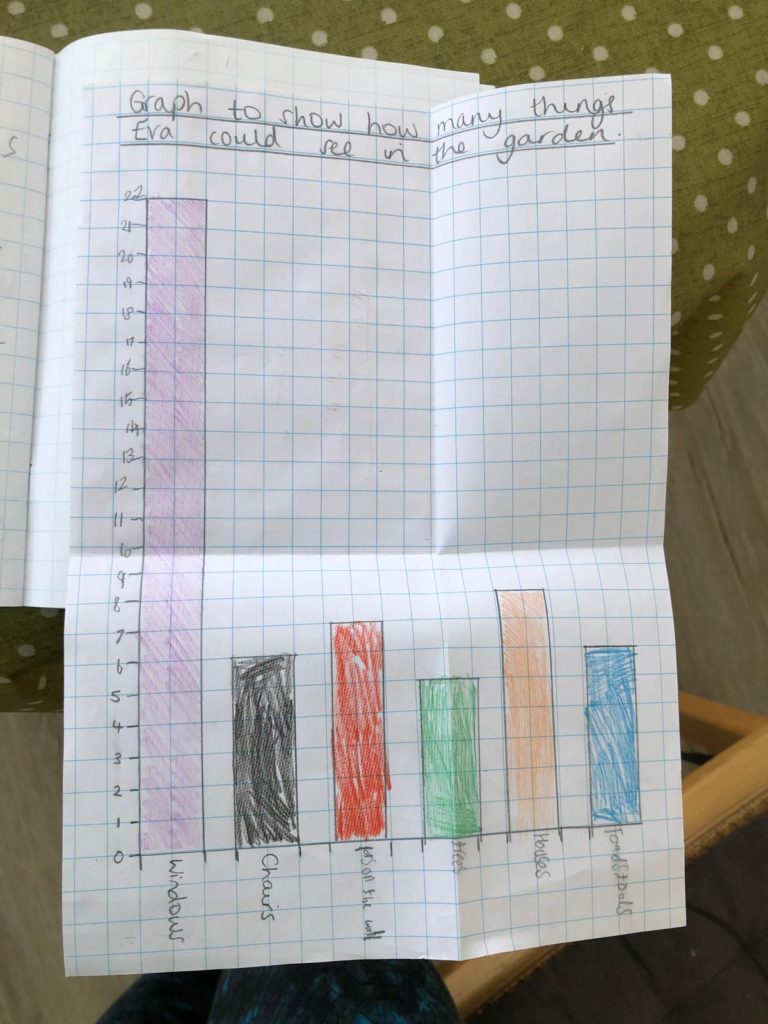
Now you draw a line for each bar on the graph to show the number of items you spotted, and you can colour them in different colours to make it easier to see. Some great maths for a nice outdoor activity!
Keep hold of it, because we will do another one mid summer!
Hopefully you saw the pre planning for this activity yesterday. Otherwise, you will need to do some freezing before you can complete this activity... its worth it though, it's good one!
You will need: A bowl, some paint or food colouring, water.
Mix the water and colouring together. Add it to the bowl and freeze.
Next you will need: salt (plenty) and water. A pipette is useful, but not essential.
Take the frozen coloured water out of the freezer. Turn it out of the bowl, so you just have the ice. Pop it into the garden or onto a tray (it's going to melt!). Ask your child(ren) to rub salt onto the top of the ice block. Use the pipette to ad small amounts of water to help the salt melt the ice. If you don't have a pippette, wet hands and rub water over the ice. Now leave for a few minutes (if its a hot day, 5 minutes will be fine, for a cold day, 15 is ideal).
Revisit the ice. Hold the block up to the sky/sunshine. What can you see?
Note: you should see the salt has made tunnels/ravines in the ice. You might want to discuss how/why this happened (salt lowers the freezing temperature of the water, so melts the ice).
For todays activity that can be completed inside, all you need is a computer and good pair of eyes. We are sending you over to Zooniverse.org, which is people powered science activities. You will be helping with real, current, scientific research projects.

If you click on the link, here, you will be able to help the drones identify spider monkeys in the rainforest. The more people who take part in this, the better the drones become at identify the spider monkeys and the better the protections that can be put in place. Children are great at spotting the monkeys, much better than adults. Just check the first couple of videos and make sure they are being as accurate as possible.
Note: Whilst this is happening, you might want to prepare for tomorrows experiment. This will need: a bowl, some food colouring (or paint), and some water. Mix the paint/food colouring with water. Pop into the bowl and into the freezer. We will use the frozen coloured water tomorrow!
We have enjoyed collecting things around the garden for our hammer pictures, nature pictures and pattern spotting. This activity has a nice maths focus too... it's repeating patterns.
You will need: a selection of items from around the garden. Try to gather 4 or 5 of each thing. We recommend sticks, leaves (different shapes can count as different ones), flowers, a few piles of earth.... You may want a piece of paper and glue to stick the patterns down.
If you have a younger child, start off by showing your child a repeating pattern. 1 leaf, 1 twig, 1 leaf, 1 twig. Explain what it is. Then start a pattern; 1 leaf, 1 flower, 1 leaf... ask them to put the next 3 bits of the pattern into the row. You may need to do this a couple of times. Once you are sure they understand, see if they can spot a mistake in your pattern.
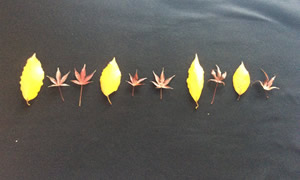
Once they can do this, ask them to create their own repeating patterns. You can extend this buy making more complex repeating patterns (see the picture below). You might want to stick these onto a piece of paper.
If you have an older child, you may want to ask them to explain a repeating pattern. Can they illustrate this by showing you? Repeating patterns can be more complex (see the page below). if you start some more complex patterns, can they complete them? Then ask them to try and catch you out, can they create a complex repeating pattern that you might find hard to finish?
To extend this, you may want to ask them if they can spot any natural repeating patterns in the garden? Tip: a slice of a tree, the teeth on the edge of a leaf, a spiders web...
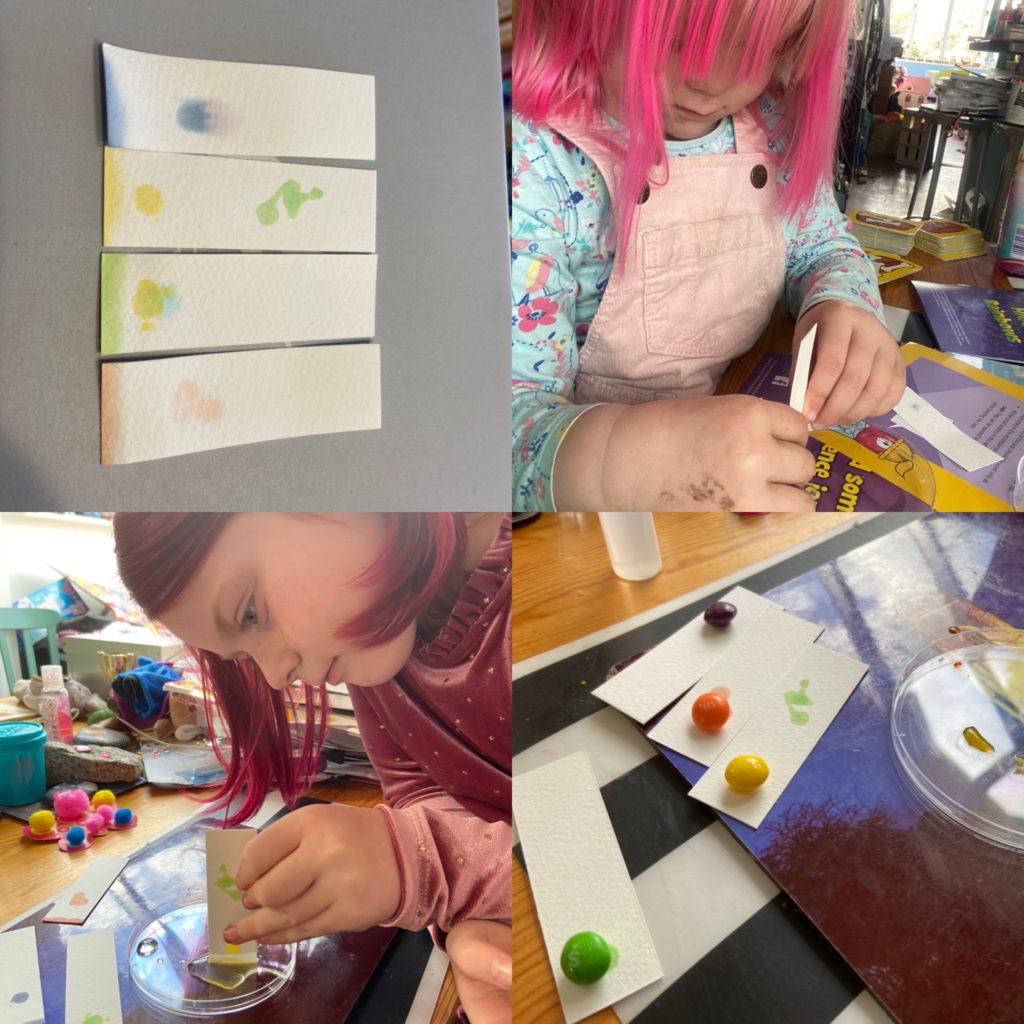
You will need: some skittles/smarties/m&ms. Coffee filter paper cut into strips or kitchen towel cut into strips, a small plate with a rim (you're going to put water in it).
Put hold a sweet into a tiny bit of water. Count to 20. Then place the sweet onto the bottom (about 1 cm from the end) and leave it to dry. Repeat 3 more times with different coloured sweets (we recommend 1 primary colour - red or yellow, then other colours - purple and green work well). You should have a small coloured circle where each of the sweets have been.
Have a chat with your children. Do they remember the colour mixing from earlier in the week? How do you make green/purple etc.
Now clean the water and hold the strip of paper just under the occurred circle in the water. Count to 60 - you should see the water absorbing up the paper. Now leave the paper to dry (and some sneaky sweet eating!)
Come back to the paper. Can you see how the colours have separated? You should see really clearly how the colours have been mixed.
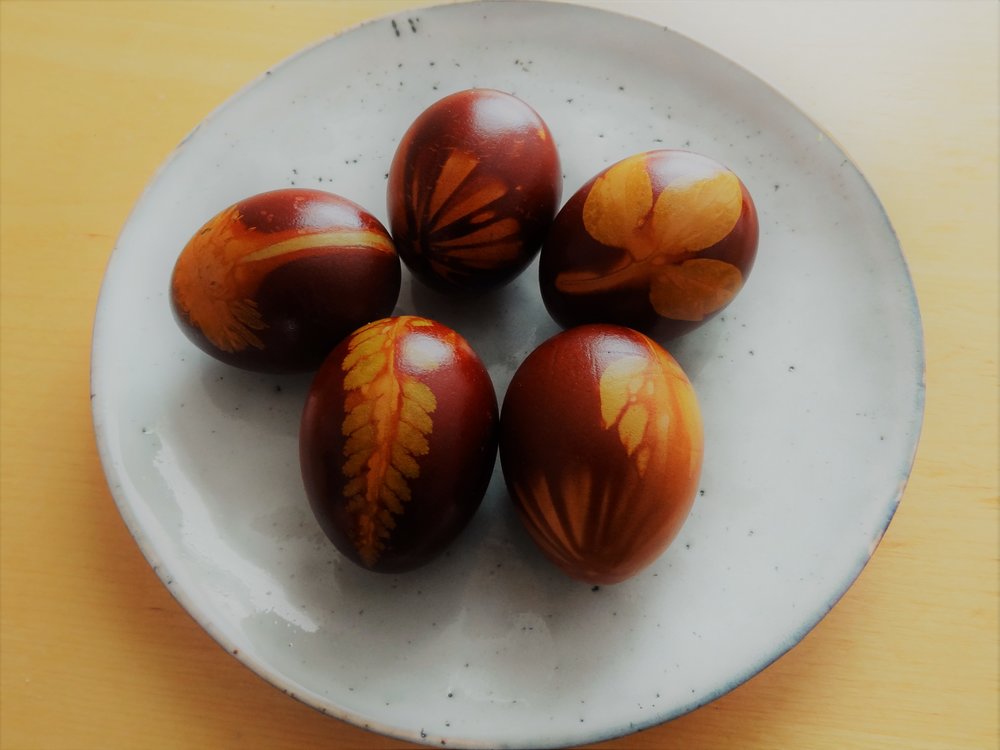
Today is Good Friday. Whether you celebrate the religious meaning of easter, or the new life spring brings, it's a great focus for activities with the children. Today, our activity is over with the lovely mud and bloom boxes.
Visit the site here to see. The photo of the eggs we've done with children, so we can recommend it! Enjoy! And don't forget to use Facebook, Twitter or email to send us pictures!
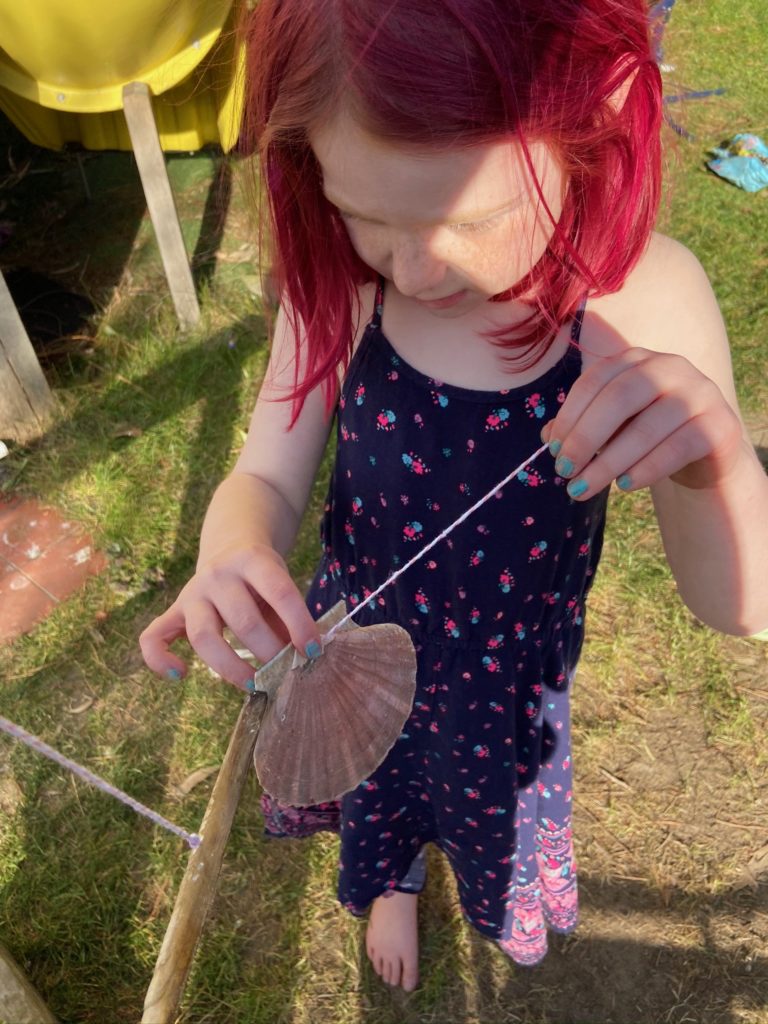
You will need: During your day walk or time in your garden you can collect, 5 large shells or pieces of wood or 5 things that make a noise when you knock them together. Some string, two reasonably sturdy twigs, a little glue, a drill (to make holes in your collected objects.
During your daily garden explore or your daily exercise, you need to collect 5 things that make a good noise when you knock them together. Here, we collected oyster shells but we have previously used stones, pieces of wood and scallop shells. I'm sure you can be inventive! You also need to collect 2 sturdy twigs (you are going to tie the shells to these. If you can't access them, you can always use the bottom of a plastic fruit tray (like a plastic grape container).
Drill a hole in the objects you have collected (if they are stones, tie the string around them like a parcel (making a cross shape on all 4 sides and glue the string on).
Tie the twigs together in a + shape. Tie around the middle winding the string in a pattern until they stay in shape. Then tie a knot to keep the together. (If you are using a plastic tray, chop a rectangle shape and pop a hole in all 4 corners and then one on each side in the middle and one in the centre).
Cut 5 equal length of string (this is important otherwise your objects won't bash together in the wind to make a sound). Tie one end to your object. Each piece of string should have an object on the end. Now tie the top of the string to your twigs. Use a bit of glue to secure them in place. (if you are using a plastic tray tie them to the corners you have put the hole in and the hole in the centre).
Now cut an extra length of string. Tie a loop in the centre to hang your windchime. Place it somewhere in the garden/on your balcony/in a window to wait for a windy day!

This is a favourite for the children I work with, even the older ones!
You will need: 3 colours of water (ideally yellow, red and blue). The easiest way to do this is to use food colouring and water and mix them together, but paint and water works just as well. 6 cups (3 with the water colours in and 3 empty). A jug of water. A pipette or old medicine syringe is helpful but not essential.
Pour some plain water into a cup (preferably see through). Use the syringe/pippette to add one of the colours into the water. Now add another colour. Mix them with a stick. What colour do they make?
It is a good idea to start simply and mix:
Yellow and red
Red and Blue
Blue and Yellow
Once the children have the idea, they can play about and see how many colours they can make! It's useful to talk about primary colours and why they are the basis for all other colours... if you're not sure, there is a video here.

It might be the Easter holidays, but as lockdown continues, so do we. We will continue to post a daily activity through the holidays, as well as at the weekends. Enjoy!
You will need: a sheet of white paper, a small mirror, a glass of water, a small bowl of water, a CD, and (not necessary but fun) a garden hose.
Rainbow 1 - this one is the easiest! Fill a large bowl or dish halfway with water and prop up the mirror inside it so some of the mirror is under the water and some is out (about half and half works well). Pop the bowl near a sunny window with direct light coming in so that it hits the mirror (early morning or early evening light works best). Holding a large white piece of paper above the mirror to catch the rainbow. You might have to move a bit until you find it. Now, move around the paper closer and then further away from the mirror to see how your rainbow changes.
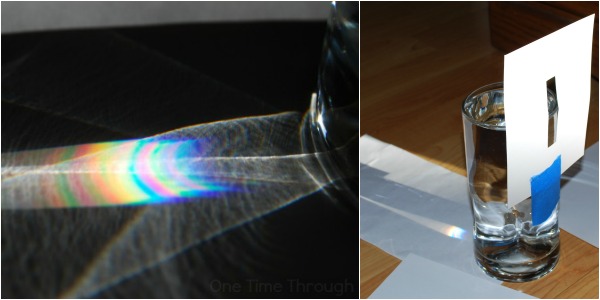
Rainbow 2 - A glass of water. Take a piece of paper and cut a thin rectangle (like a vertical thin postbox) into the middle. Tape this onto the side of a smooth, clear drinking glass so that the sun’s rays can pass through. Fill the glass with water, all the way to the top. Place the glass on a white floor or white piece of paper, making sure the sun’s rays are shining through the slot in your paper and hitting the surface of the water. This is best done in the middle of the day, in the sunniest spot of your garden. You should see a mini-rainbow appear below the glass!
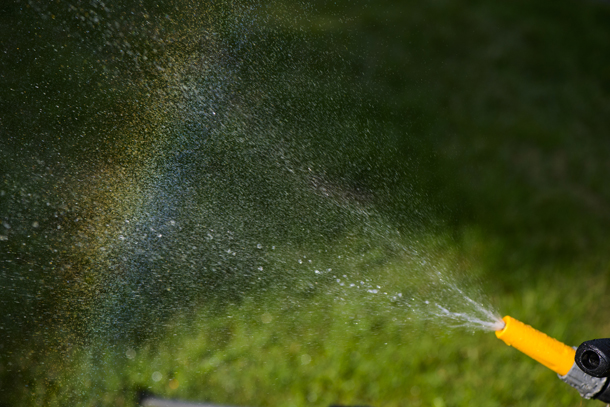
Rainbow 3, a water spray rainbow! Stand in a spot where the sun is behind you, shining on your back. (You will be able to see your shadow in front of you when the sun is behind you.) Put your thumb over part of the end of the hose so that the water creates a spray when it comes out (or use a spray attachment). Hold the hose out in front of you and turn slowly. Keep you finger over the hose to make a spray. Watch for a rainbow to appear above the water. A rainbow should appear just above the spray of water from your hose when sunlight hits the water at the right angle.
You might want to explain why this happens. This is how I usually explain it: Sunlight is made up of many colours all put together. A rainbow appears when the light gets split up into its 7 different colours: red, orange, yellow, green, blue, indigo and violet. The reason the light gets split up, is because it is passing through water that bends the light. The different colours bend in different amounts. The least bendy colour, Red, appears on the top of the rainbow, while the most bendy colour, violet ends up on the bottom – all the other colours end up in between.
When we see a rainbow in the sky, it is usually when the sun is shining through millions of tiny raindrops floating in the sky. All of the raindrops are working together, bending the light and projecting the rainbow.
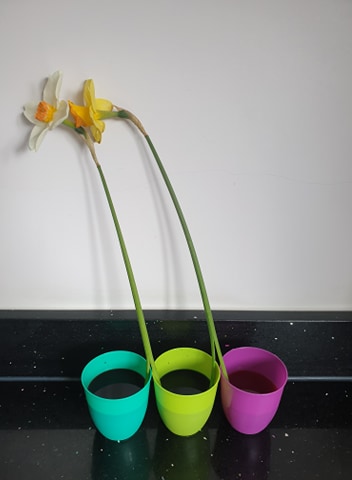
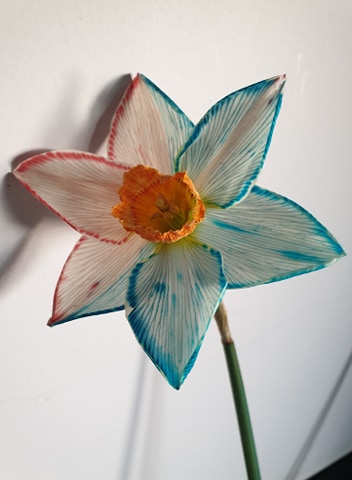
You will need: Coloured food dye (most strong colours work: red, blue, purple, green, orange), 2 cups per flower, a pair of scissors, as many flowers as you want to try (we tried this with tulips, daffodils and lilies we had been sent in the post - they all worked well).
Pop a little food colouring into a small cup with some water. Ensure you make it quite strong. Now do the same again with another cup - we had blue water and red water. Pop the cups next to each other, touching. Cut a flower you would like to use from the garden or during your daily exercise. Now, very carefully, cut down the middle of the stalk (to about 1/4 or 1/3 up). Put the flower straight into the water, one side of the stalk in one cup, one side of the stalk in the other cup.
Keep a daily eye on the flower. It will begin to change colour!
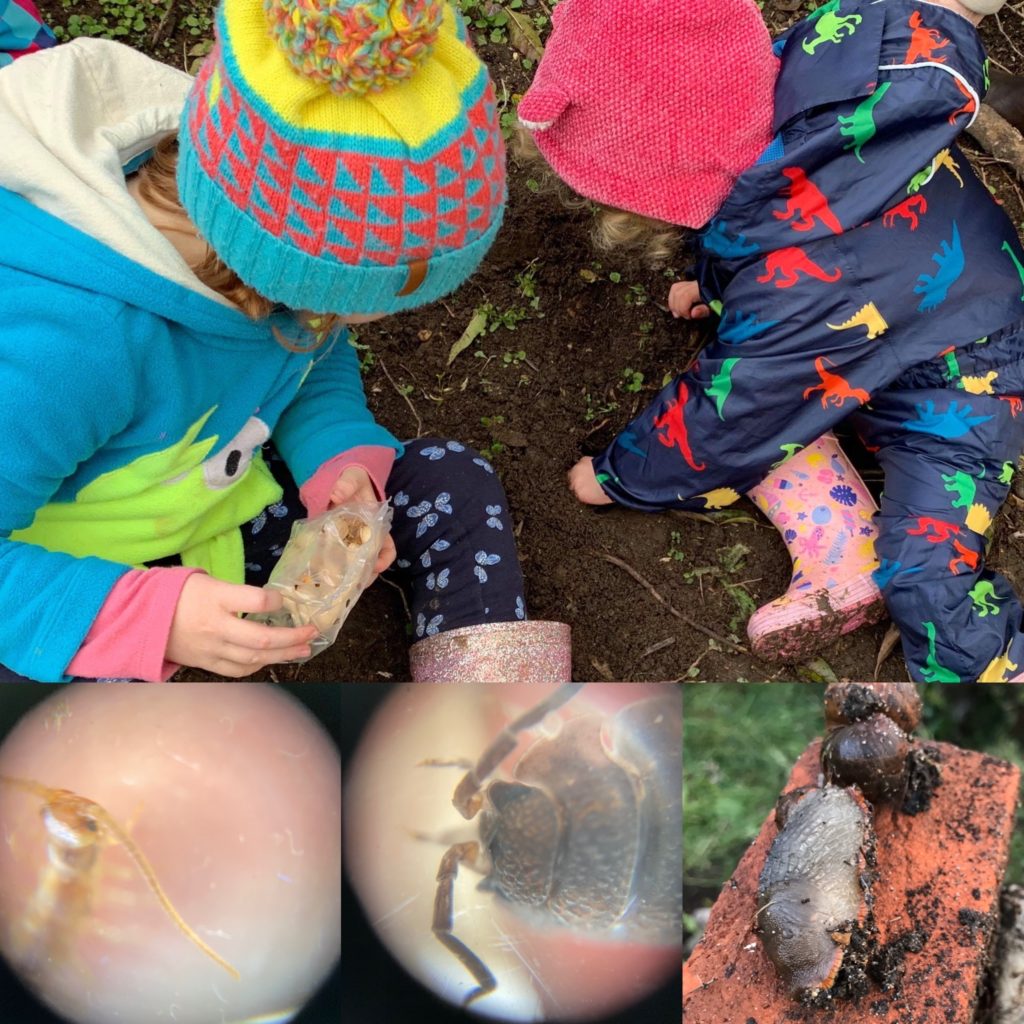
Beautiful weather expected up and down the country this weekend, perfect for a little bug hunting!
You will need: If you have one, a magnifying glass or clip on microscope. A piece of paper and a pencil
Download our garden animal spotting chart and use it to find the animals listed. How many can you find?
Chose the one you like the most and really look at it.
Now can you draw it, really carefully?
If you'd like to you can send it to us and we will pop it up here.
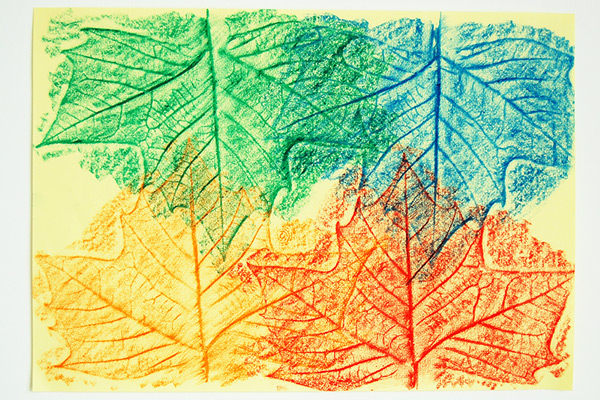
You will need: leaves (a few different shapes and patterns is helpful, but not essential), crayons, thin paper.
During your walk or in your garden, collect a few leaves of various sizes and shapes. Ideally 4-6. Position the left so it is upside down (botton up with the veins facing you) on a hard, flat surface (like a table). Place the paper over the leaf (if you have a very small child, you may wish to tape the paper down). Using the side of the crayon, rub the crayon very gently over the leaf. Do this over and over again until you see the pattern appearing. Now remove the leaf.
Can you explore? what other interesting patterns can you find in your garden? We found bark rubbings looked really cool, fence panels, big rocks and grasses looked interesting.
If you sit very quietly at a window, you might see some garden birds. There are two RSPB resources that can help you with this: the online bird identifier and the bird spotter worksheet.
Put a timer on for 10 minutes and then place a tick next to each bird you see. Can you do this three times in the same day? We suggest first thing in the morning, around lunchtime and then in the afternoon when school might usually end.
If you would like to extend this task, you could draw a bar chart to show the most common birds in your garden. We did this activity for 3 different days in the week, and then compared our bar charts.
To draw a bar chart, you might want to watch this video or use this template.
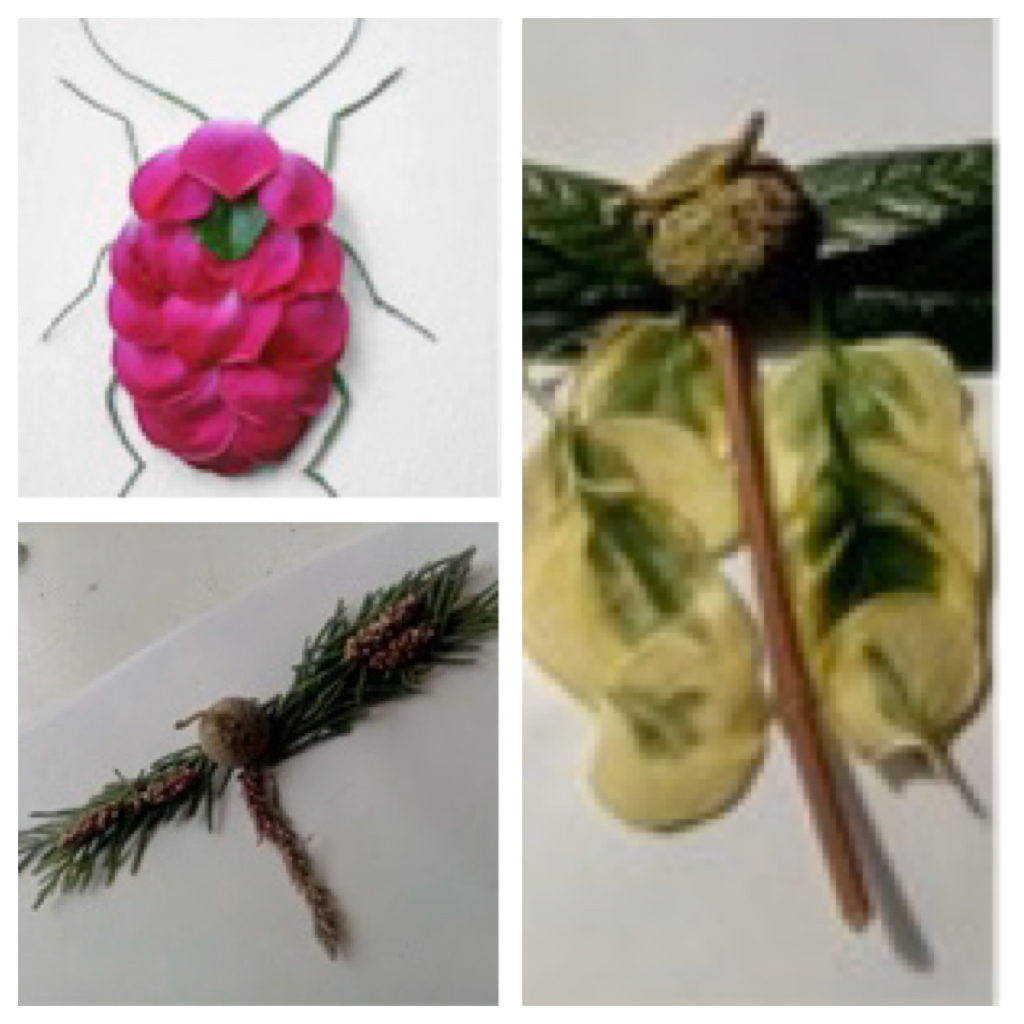
You will need: Paper, glue and possibly paints and a paint tray if you want to extend this activity.
Head into the garden or to your local green space (or beach) whilst you are doing your daily exercise and collect anything you think looks interesting.
For green spaces - lots of different flowers, petals fallen down to the floor, a stick, lots of different shaped leaves, grass heads, etc
For the seaside - seaweed, shells, driftwood, tideline finds, interesting stones, sea glass etc .
Use them to make a picture or sculpture. By choosing an animal you'd like to make a picture of, drawing an outline (or asking a grown uo to draw one or print one off for you) and then sticking your objects onto the animal to decorate it).
We suggest crabs, jellyfish, dragon flies and butterflies, but you can be as creative as you want! You can send them over to us and we will put them up to show your hard work!
If you want to take this further, you could use some as paintbrushes - dipping them in paint then painting or stamping patterns onto the paper (or a fence!) If you feel some and they feel rough or bumpy, they might make a good pattern when you roll them too. What pictures can you make using this technique?
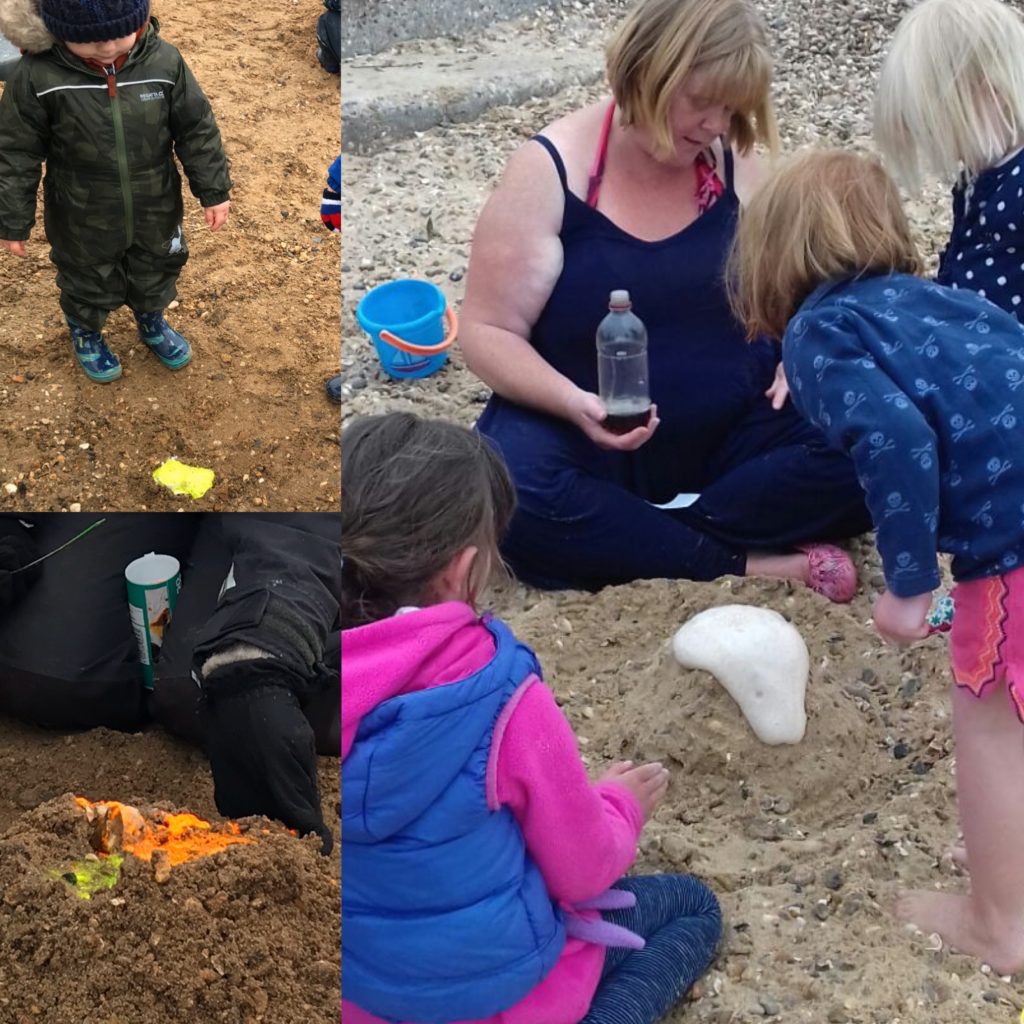
You will need: Bicarbonate of soda, Vinegar, a spade.
Handy but not necessary; a pipette, 2 different colours of paint
Use your spade to make a little mud volcano shape in the garden. Make a little well in the top of the volcano and pour a little bicarb into the well.
If you have a pipette you might want to squirt some vinegar into a cup, so your child can use the pipette to suck up vinegar and squeeze it onto the bicarb. If you don't, your child will pour it straight onto the bicarb. Watch for the eruption.
Your child might want to repeat this a few times. If you mix the vinegar with paint first, you get a coloured volcano. You can use one colour and repeat again with a different colour to get stripes volcanos. This is also a good way to learn about colour mixing.
Note: If you do not have a garden you can do this experiment with a beaker, but you might want a tray underneath, as it can get a little messy!
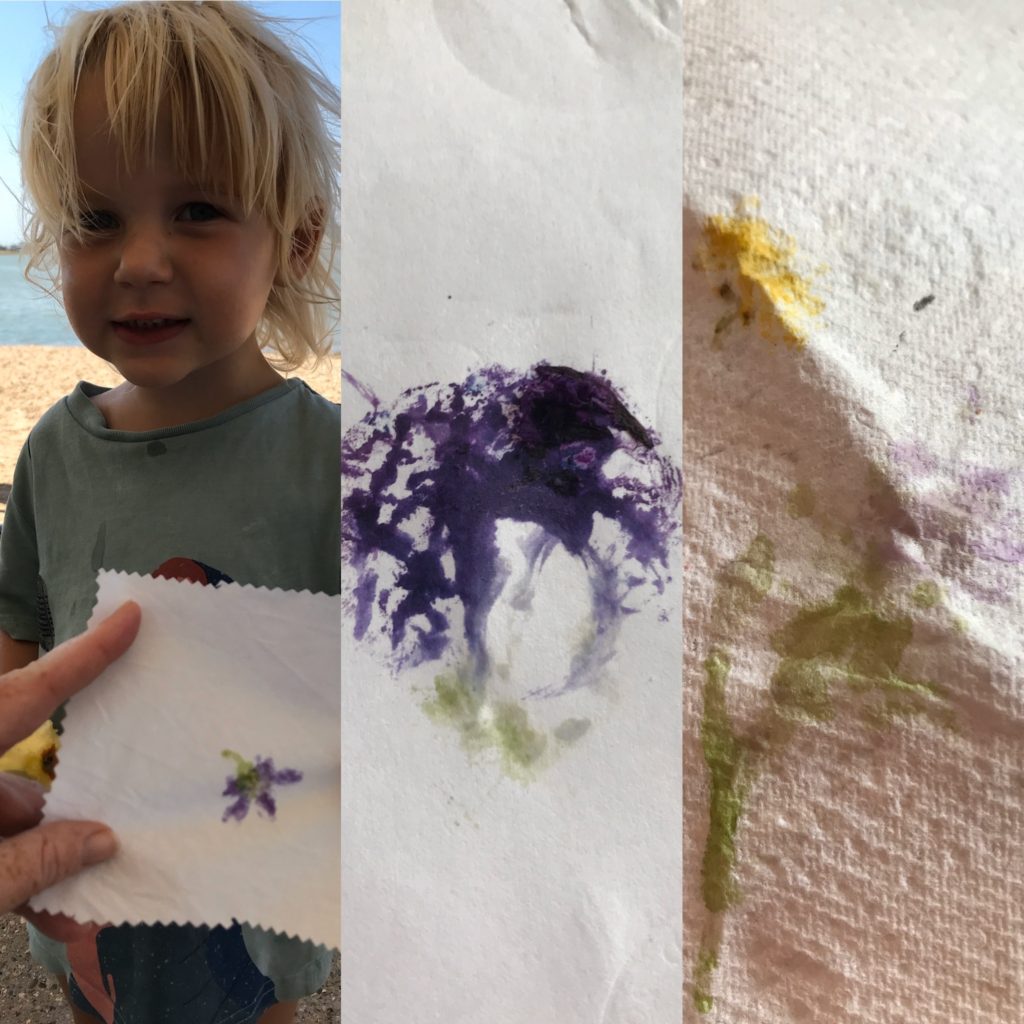
You will need: paper or a square of pale coloured fabric, 1 piece of kitchen towel, a hammer and sellotape. This will need to be done on a flat, hard surface.
Go and collect some brightly coloured flowers (pansies, marigolds, grape hyacinths work well) and a couple of interesting shaped leaves.
Place them carefully on your fabric/paper. Make sure they are where you want them. Place the kitchen towel over the top. Tape them down so they don't move about. Now for the fun part, bash! Take the hammer and bash over and over again. You should start to see the pattern of the flower showing through the kitchen towel. Keep bashing!
Slowly unpeel the kitchen towel and look at the print you have made.


