This is one of my favourite weather experiments. Children as young as 3 understand the basics and older children really begin to see how a weather front is formed.
You will need: A Clear plastic container roughly the size of a shoebox food storage boxes or lunch boxes work well. If you down have clear white or very pale will do. Red food colouring/paint, a jug, hot water and ice cubes made with water & blue food colouring/paint.
Fill the plastic container two-thirds full with lukewarm water. Let the water sit for a minute to come to air temperature. Whilst the water is sitting, mic the red colour in with hot water.
Place a blue ice cube at one end of the container. Watch as the ice cube starts to melt. What happens to the colour - does it sink, stay in the middle or go along the water surface?
Carefully, gently pour the red, hot water into the other end of the container. Watch what happens! Does it sink, stay in the middle or go along the water surface?
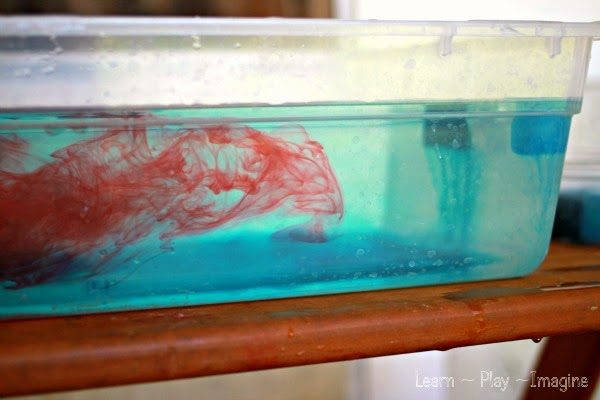
Here’s the explanation: the blue cold water (representing a cold air mass) sinks while the red warm water (representing the warm, unstable air mass) rises. This is called convection and the warm air is forced to rise by the approaching cold front, and the thunderstorm forms.
If you enjoyed this activity you might also enjoy our other weather activities: making a rain gauge, making a wind sock, making it rain in a jar, making a cloud in a jar, cloud dough and a tornado in a jar.