Hopefully you saw the pre planning for this activity yesterday. Otherwise, you will need to do some freezing before you can complete this activity... its worth it though, it's good one!
You will need: A bowl, some paint or food colouring, water.
Mix the water and colouring together. Add it to the bowl and freeze.
Next you will need: salt (plenty) and water. A pipette is useful, but not essential.
Take the frozen coloured water out of the freezer. Turn it out of the bowl, so you just have the ice. Pop it into the garden or onto a tray (it's going to melt!). Ask your child(ren) to rub salt onto the top of the ice block. Use the pipette to ad small amounts of water to help the salt melt the ice. If you don't have a pippette, wet hands and rub water over the ice. Now leave for a few minutes (if its a hot day, 5 minutes will be fine, for a cold day, 15 is ideal).
Revisit the ice. Hold the block up to the sky/sunshine. What can you see?
Note: you should see the salt has made tunnels/ravines in the ice. You might want to discuss how/why this happened (salt lowers the freezing temperature of the water, so melts the ice).

It might be the Easter holidays, but as lockdown continues, so do we. We will continue to post a daily activity through the holidays, as well as at the weekends. Enjoy!
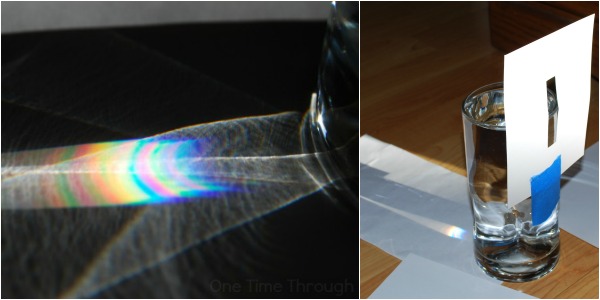
You will need: a sheet of white paper, a small mirror, a glass of water, a small bowl of water, a CD, and (not necessary but fun) a garden hose.
Rainbow 1 - this one is the easiest! Fill a large bowl or dish halfway with water and prop up the mirror inside it so some of the mirror is under the water and some is out (about half and half works well). Pop the bowl near a sunny window with direct light coming in so that it hits the mirror (early morning or early evening light works best). Holding a large white piece of paper above the mirror to catch the rainbow. You might have to move a bit until you find it. Now, move around the paper closer and then further away from the mirror to see how your rainbow changes.

Rainbow 2 - A glass of water. Take a piece of paper and cut a thin rectangle (like a vertical thin postbox) into the middle. Tape this onto the side of a smooth, clear drinking glass so that the sun’s rays can pass through. Fill the glass with water, all the way to the top. Place the glass on a white floor or white piece of paper, making sure the sun’s rays are shining through the slot in your paper and hitting the surface of the water. This is best done in the middle of the day, in the sunniest spot of your garden. You should see a mini-rainbow appear below the glass!

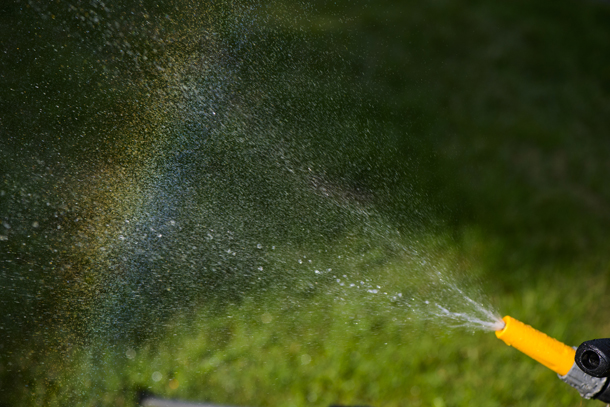
Rainbow 3, a water spray rainbow! Stand in a spot where the sun is behind you, shining on your back. (You will be able to see your shadow in front of you when the sun is behind you.) Put your thumb over part of the end of the hose so that the water creates a spray when it comes out (or use a spray attachment). Hold the hose out in front of you and turn slowly. Keep you finger over the hose to make a spray. Watch for a rainbow to appear above the water. A rainbow should appear just above the spray of water from your hose when sunlight hits the water at the right angle.
You might want to explain why this happens. This is how I usually explain it: Sunlight is made up of many colours all put together. A rainbow appears when the light gets split up into its 7 different colours: red, orange, yellow, green, blue, indigo and violet. The reason the light gets split up, is because it is passing through water that bends the light. The different colours bend in different amounts. The least bendy colour, Red, appears on the top of the rainbow, while the most bendy colour, violet ends up on the bottom – all the other colours end up in between.
When we see a rainbow in the sky, it is usually when the sun is shining through millions of tiny raindrops floating in the sky. All of the raindrops are working together, bending the light and projecting the rainbow.


