Good morning. A lovey hands on science and art activity today! It's great for smaller kids but actually in my experience, much older children also really enjoy it too.
You will need: milk (any type!), a shallow tray, washing up liquid, a pipette or something to drip food colouring, 3 or more different food colourings, a cotton wool bud (or a paint brush would work well). If you want to make marbled paper you can use any paper to dip, but watercolour paper works amazingly well! If you do this, you will need a paper drying area set up too.
Cut your watercolor paper to a size that easily fits within your tray (we used small squares). Place the stack of paper near your tray because once you start to see swirling colours you need to use the paper quickly. Pour a thin layer of milk into the bottom of your tray. Using the pipette, add in a few (start with about 3) drops of food colouring scattered around the milk. Now for the fun bit!
Dip the end of the cotton wool bud into the washing up liquid. Tap the excess off the end and touch it into a dot of the food colouring, in the milk. The soap and food coloring will now start interacting with each other and the colours will swirl around. Little and often works best!
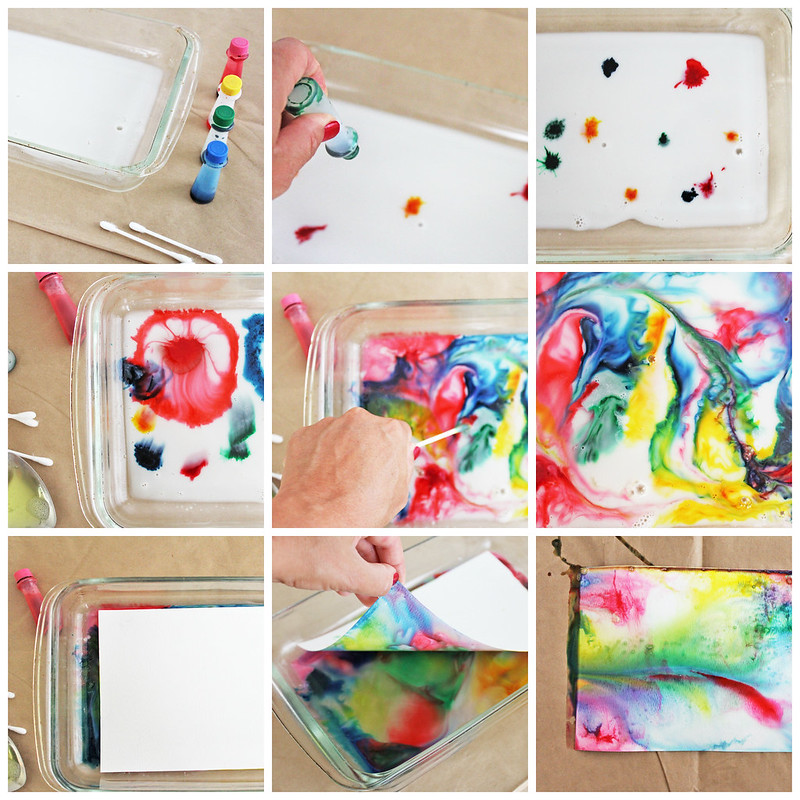
This is exciting enough on its own, but if you want to extend it, or you have older children, you can make marbled paper. To do this, before the colours get too mixed together take one sheet of your paper and lay it on top of the milk mixture. Press down. Gently lift it, set aside to dry, and continue with additional sheets.
Leave to dry completely. We were amazed with the results! Enjoy!
If you enjoyed this, you may also enjoy some of our Science activities: chromatography, salt patterns, the ice challenge or nature egg dying.
It's another rainy day here again today and maybe for you too, so I've shuffled the activities a little bit so this task can be an indoor or outdoor one. It takes a bit of planning and waiting but it's worth it!
You will need: For the first bit: food colouring or paint, water, anything to freeze water in - we suggest a bowl or mug - and a freezer. For the second bit: salt, a pipette or water pistol (a paint brush works too) and a tray or plate to work on.
Using a your container, fill 2/3 with water. Now mix in food colouring or paint so you have a strong colour. Now pop it into the freezer. If you don't have the freezer space, you could use an smaller egg cup or a cup quite easily. You might want to do a few of these in different colours. It will probably take a few hours to freeze (we usually freeze in the morning so that we can then do the activity in the afternoon).
Once your ice has frozen you get the fun bit. Turn the ice out of its container. Pop some salt into a pot and some water in a small cup. Rub the salt onto the top of the ice and the use the pipette, water pistol or paint brush to slowly add water. As you sprinkle the salt and add the water, rubbing it in, you should see tunnels and grooves start to form. It makes an unexpectedly beautiful pattern when you hold it up to a light or window.
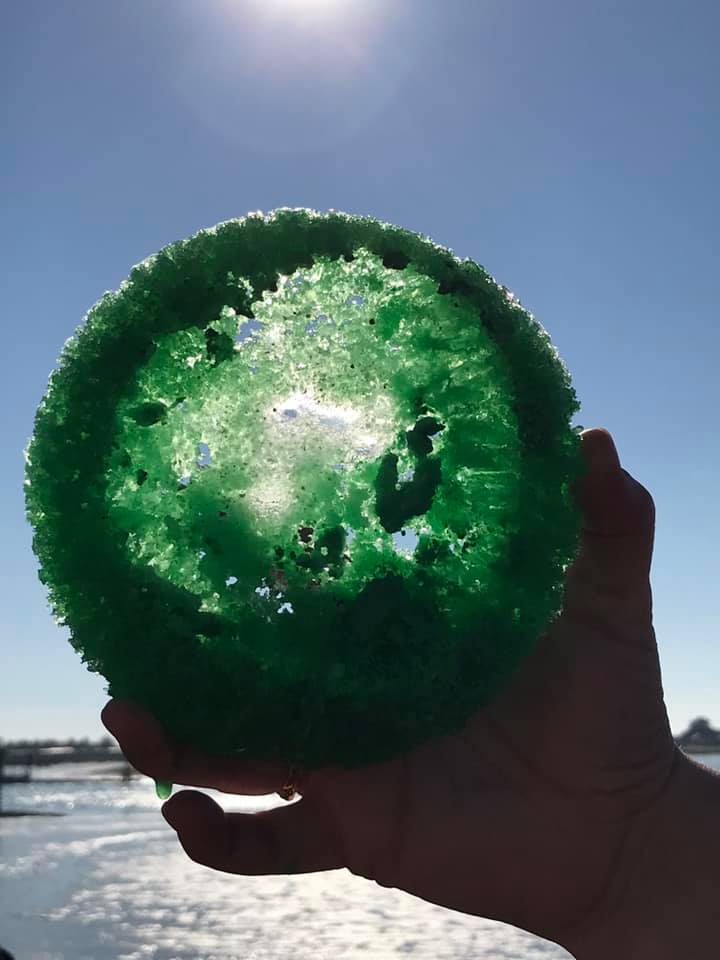
We often repeat this activity but make the water we're using with the salt a different colour (for example yellow ice and red water or red ice and blue water) so we see the two colours and some colour mixing too. It's a great revisit of our water colour mixing activity or our food dye splitting activity which are both in our activity bank.